+1-480-241-8198
 +44-7428758945
 +61-1300-332-888
 +91 9811400594
Salesforce data migration is a critical task for administrators and implementation teams, whether you’re moving from a legacy system or consolidating multiple Salesforce orgs. While there are many migration approaches available, Salesforce provides two native tools—Data Loader and Import Wizard—that cover most day-to-day data upload and maintenance needs.
This guide focuses on how and when to use these tools, their supported operations, and the practical rules you should follow to migrate data safely without breaking object relationships.
Whether you are transitioning from a legacy system to Salesforce or unifying several Salesforce based silo systems into one, data migration needs would always arise. While there can be several options to accomplish it using:
- Open APIs (SOAP, REST, Streaming, etc.)
- Bulk Data Transfer API
- Data integration tools like Mulesoft, Talend etc.
In this blog, we talk about two very easy to use graphical tools, Data Loader & Import Wizard, that are widely used for operational Salesforce data migration.
Salesforce Import Wizard
Import Wizard – The Import Wizard is designed for less-technical, business users and smaller, simple imports of up to 50,000 records. It is best suited for one-time uploads where complex transformations or automation are not required.
It supports the following standard objects:
- Accounts
- Contacts
- Leads
- Solutions
- Campaign Member Status
- All custom objects
The Import Wizard can be reached at:
Set Up > Data Management > Data Import Wizard > Launch Wizard
Salesforce Data Loader
Data Loader – The Data Loader uses the Force.com API and is intended for administrators and Salesforce consultants handling larger datasets or recurring data operations.
The Data Loader can be downloaded from the Setup menu under:
Setup > Administration > Data Management > Data Loader
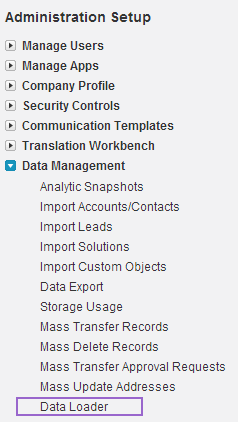
N.B. – For this download, the system must have JDK installed.
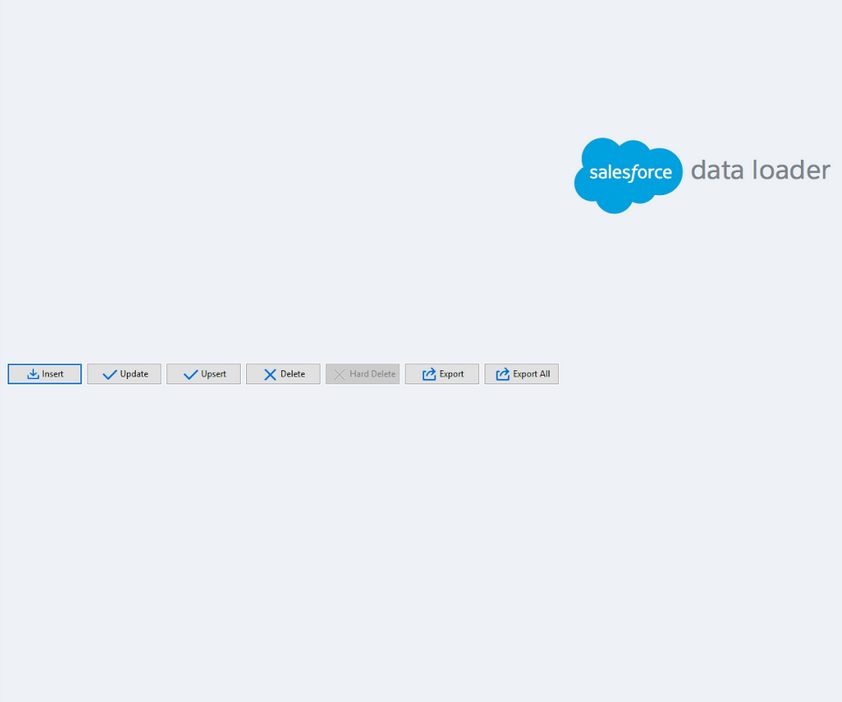
Data Loader consists of the following operations:
- Insert – Used for inserting new records
- Update – Used for updating existing records
- Upsert – Updates existing records and inserts new ones using a unique identifier
- Delete – Used for cleansing data by deleting records using record IDs
- Export – Used for exporting selected object data
- Export All – Used for extracting complete org data, including soft-deleted records, for backup
Steps for Uploading Salesforce Data
Salesforce is all about relationships. For example, Accounts are related to Users, and Contacts are linked to Accounts. Similarly, multiple relationships exist across Salesforce objects through lookups and related lists.
Therefore, while migrating data, a particular order must be followed to maintain relationship integrity and avoid lookup failures.
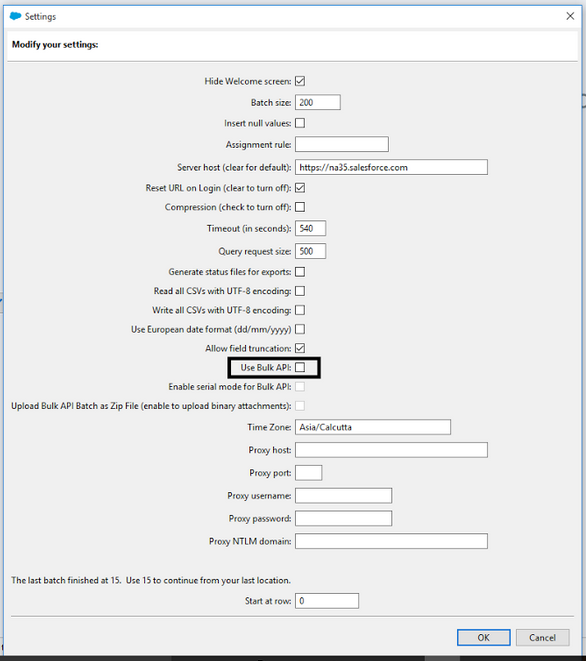
The default batch size for uploading data is 200. If you want to upload data in bulk, enable the “Use Bulk API” checkbox from the Settings tab in Data Loader to increase load speed and efficiency.
Some Basic Rules to Remember
- The scope of migration should be clearly defined
- The user should be aware of the source and target data formats
- Data Loader stores both Success and Error files. Always maintain a separate Unique ID column in the source file to easily reprocess failed records.
- Mapping files should always be saved for reuse and rollback
- Unit-level testing should be completed after migration in the target org
That is all for this article. In case you need Salesforce Implementation Services for any Salesforce-related work, please feel free to reach out to sales@girikon.com.
About Author

Nirupama Shree is currently working as a Business Analyst at Girikon, managing projects related to Salesforce. She has work experience in requirement gathering, blogging, maintaining client relations and has experience in technologies like Salesforce, Magento, Opencart. In her leisure time, she loves listening to music.
Share this post on: